Integration guide
Connect MIEA with Plato
To integrate your Plato account with the MIEA Health system, you need to issue an API key, provide your database name, and make sure your appointment statuses are compatible with MIEA.
About 10 minutes · Plato administrator access required
Before you start
- Have administrator access to your Plato account.
- Know your Plato database name — it was provided when you first connected to Plato.
- Have your MIEA contact ready to receive the API key and database name.
Step 1
Issue an API key
The API key allows information exchange between your Plato account and the MIEA Health virtual assistant.
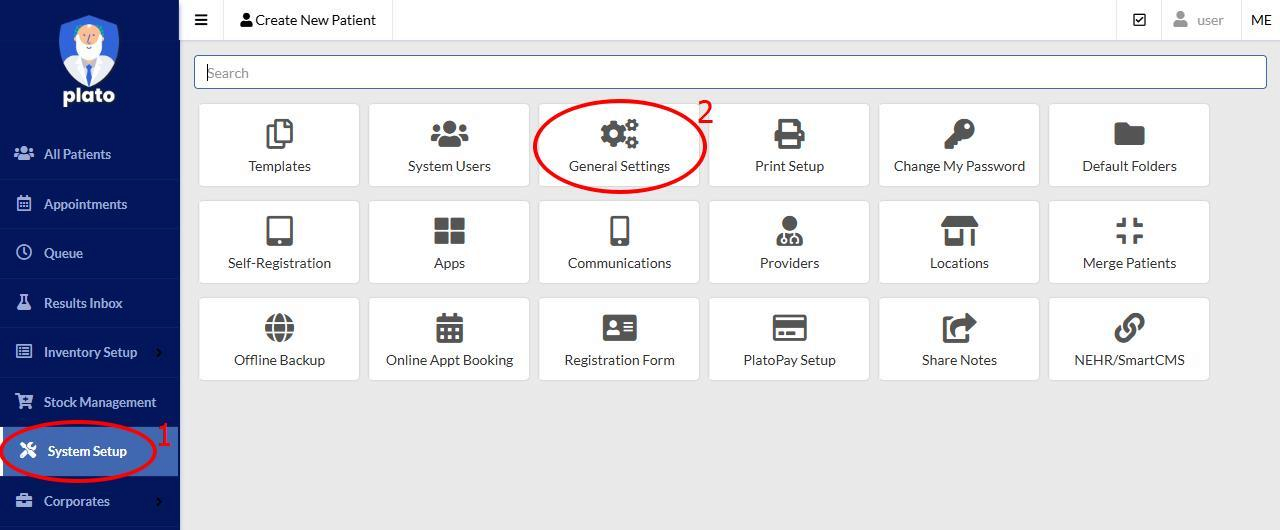
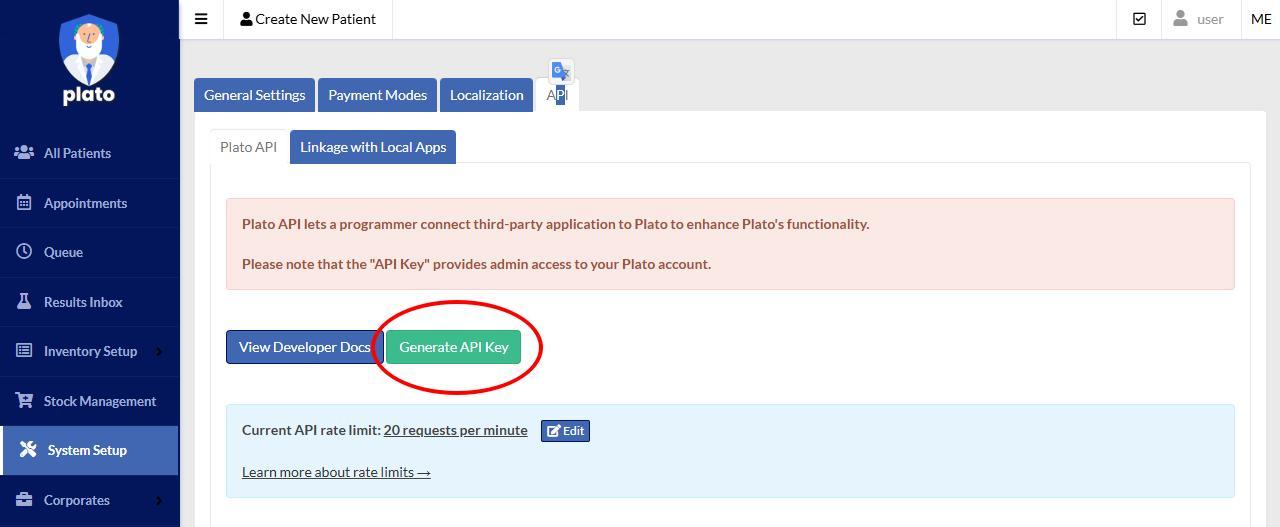
- 1 Log into Plato and go to Menu → System Setup → General Settings (or navigate directly to
clinic.platomedical.com/#/setup/strings). - 2 Choose the API tab.
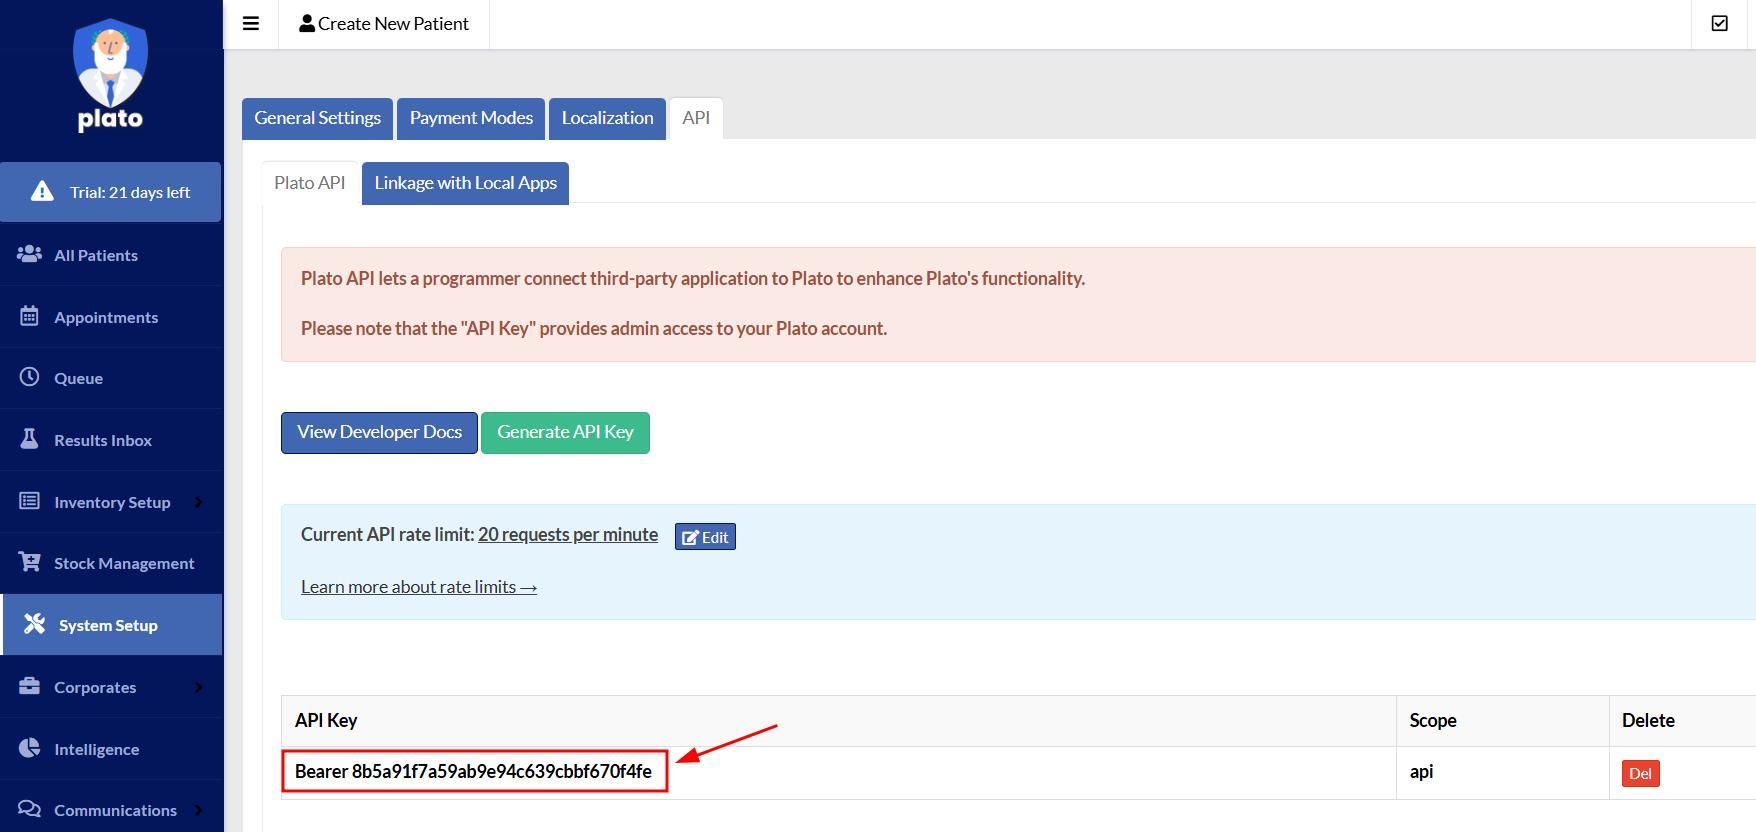
- 3 Click the "Generate API Key" button.
- 4 Copy the API key and provide it to your MIEA Health representative.
Note: You have full control over the issued API key in your Plato account. You can delete it at any time — from this point on, the exchange of information with MIEA Health will fully stop.

Step 2
Provide your database name
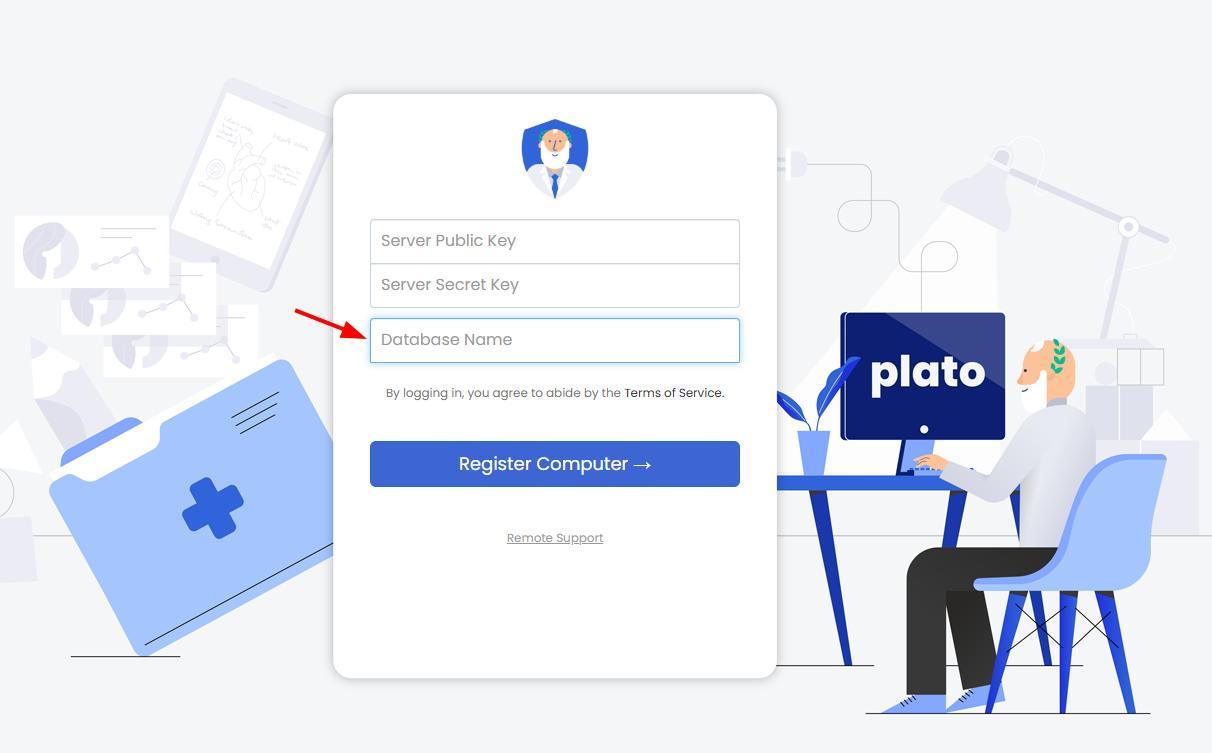
MIEA needs your Plato database name to identify your clinic in the Plato system. When you connected to Plato, you were given a database name among your other credentials — you use it every time you log into Plato on a new device.
- 1 Find the database name you were given when you first connected to Plato.
- 2 Share the database name with your MIEA Health representative.
Note: Do not share your Server Public Key or Server Secret Key. They are not required for integration and must be kept secret.
Step 3
Check appointment statuses
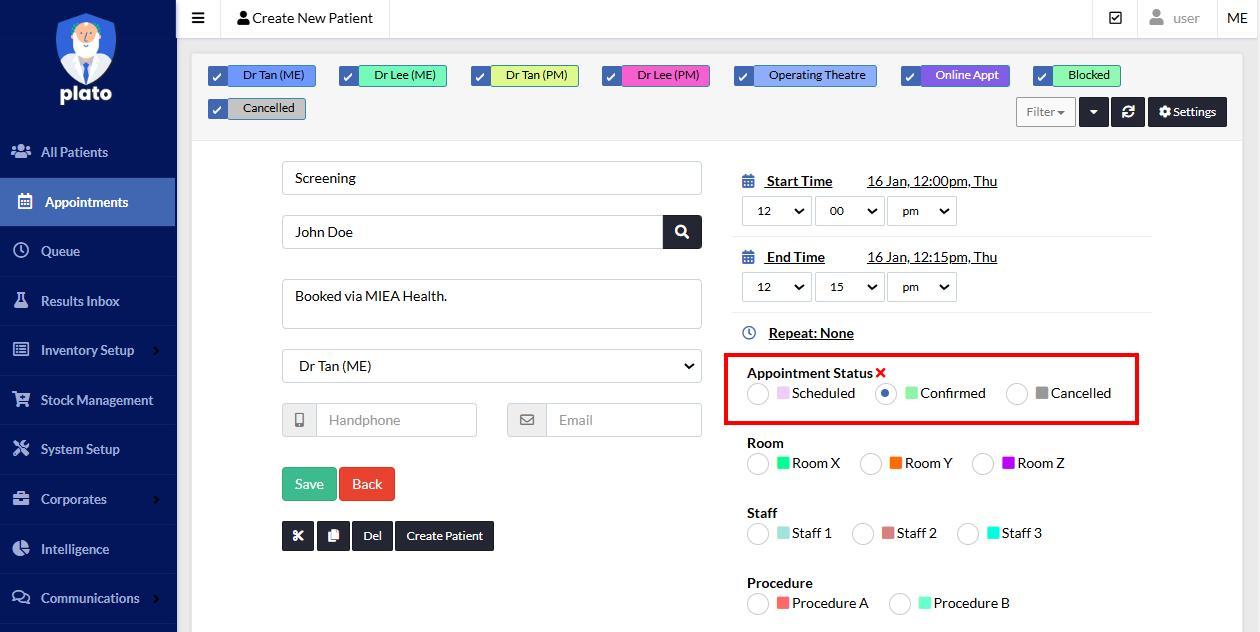
MIEA synchronizes appointment statuses with Plato. For example, if a patient cancels an appointment via the WhatsApp chatbot, it will be marked as "Cancelled" in both MIEA and Plato schedules, and other patients can be offered the vacated time slot. Three statuses are used: Scheduled (patient has just made an appointment, pending confirmation), Confirmed (clinic staff has confirmed the date and time), and Cancelled (the visit has been cancelled).
- 1 Make sure your Plato account has exactly three appointment statuses with the names: Scheduled, Confirmed, and Cancelled.
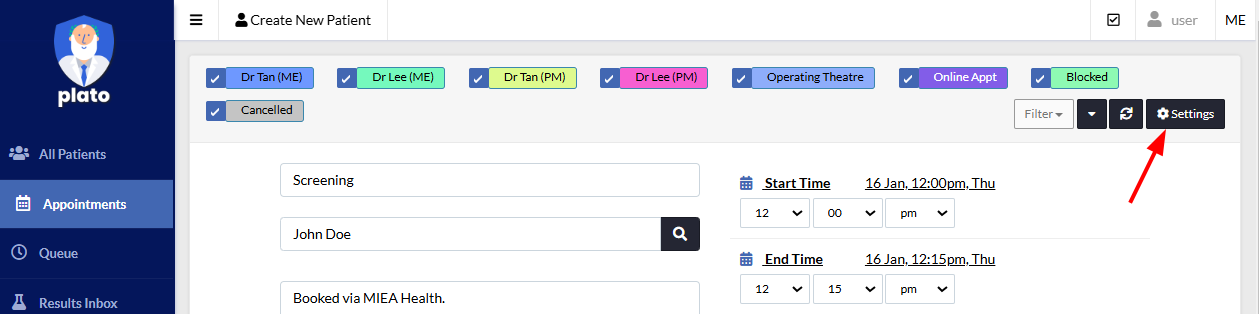
- 2 If your current statuses are different, click the "Settings" button to change them.
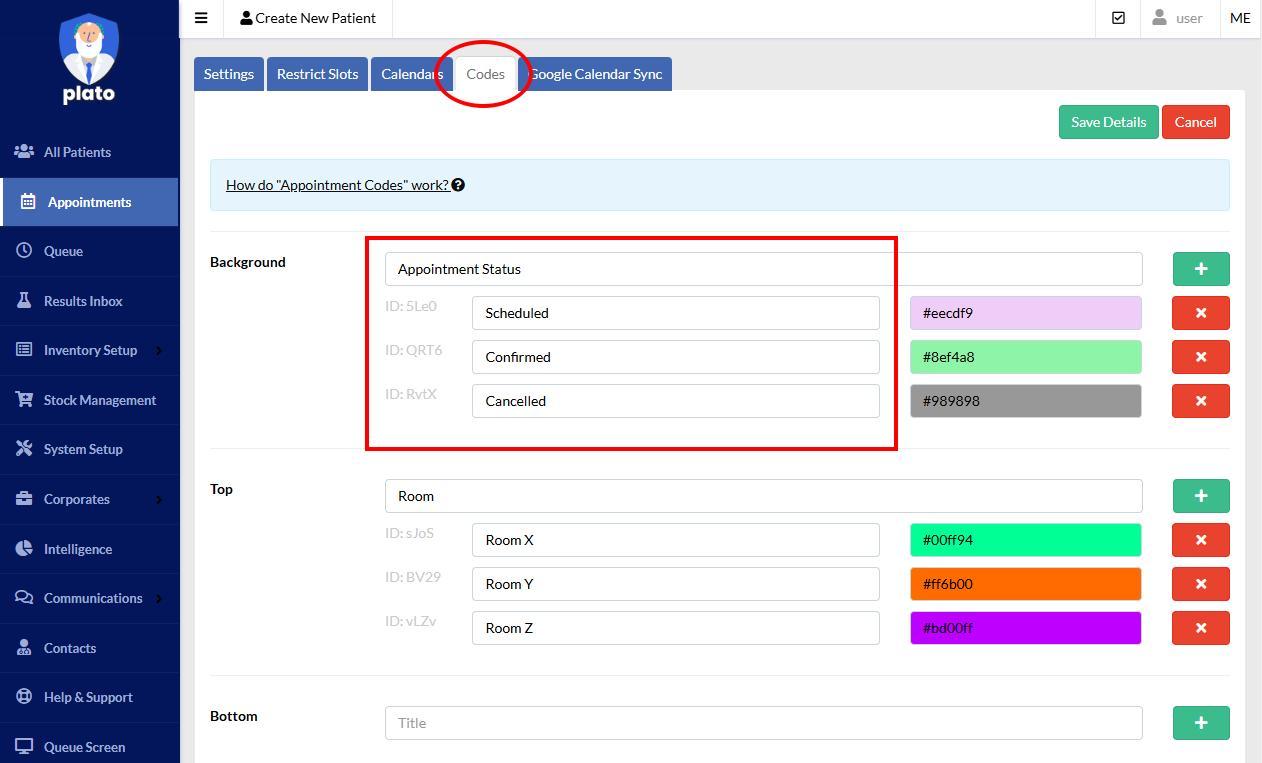
- 3 Go to the "Codes" tab and set up the three statuses. If the Background code is already occupied by another appointment property, you can use Top, Bottom, Left, or Right code instead.
- 4 If you have any questions about meeting the integration requirements, contact the MIEA support team — we'll help you resolve them.
Note: The color of the statuses does not matter for integration. The only requirement is exactly three statuses named Scheduled, Confirmed, and Cancelled.